Windows 10, the latest OS from Microsoft offers a host of existing features that take your experience to the next level. The polished user interface and relatively faster OS have attracted more and more users to upgrade to the latest version of Windows operation system. However, it is not free from flaws – there are a couple of things you need to tweak immediately after installing the OS in order to improve the experience.
So, here are five tweaks you must apply to your PC after installing Windows 10:
Disable WUDO (Windows Update Deliver Optimization)
Yes, this is the most important thing you need to do right after installing the Windows 10. Why?
Because the default settings in Windows 10 include a new peer-to-peer update delivery mechanism which, if left as is, will help your machine to spread the update to all other PCs on your local network.
While this sounds like a smart idea, it actually waste tons of precious bandwidth, and if you’re on a metered connection, this could mean your internet bill might go through the roof.
But, thankfully, there’s an option to stop that from happening, which is hidden so deep inside the settings, it will be difficult for many users to tweak it.
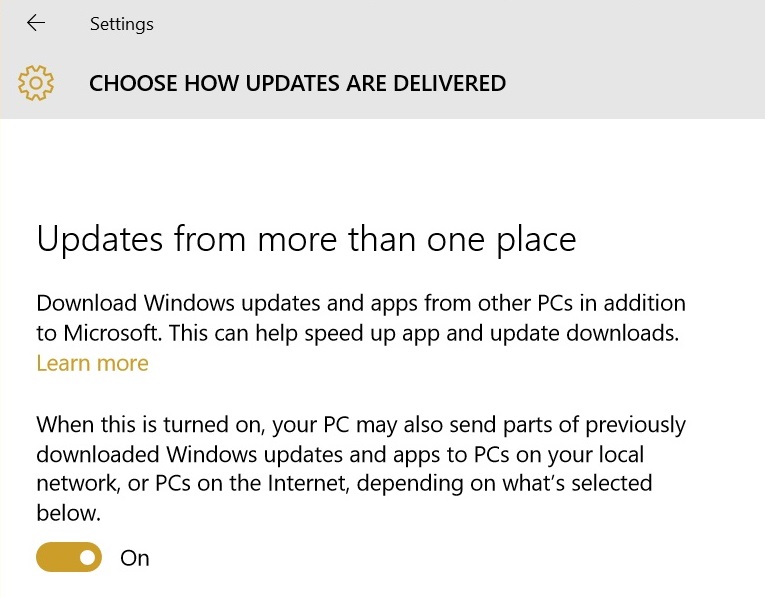
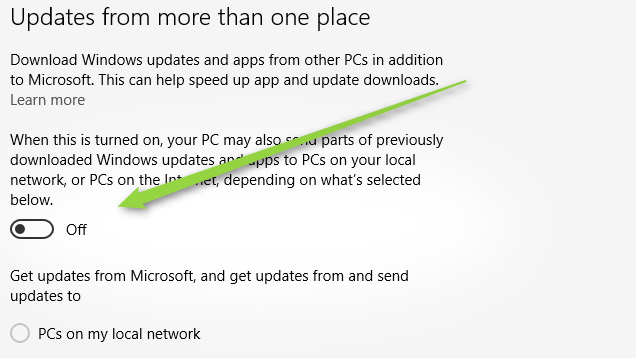
This is how it looks on default
Here’s what you need to do to change it
Step #1: Search for “Check for updates” in the Start menu.
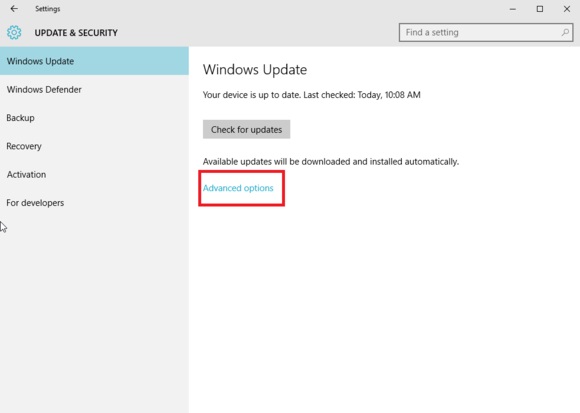
Step #2: Choose “Advanced options” under Windows Update
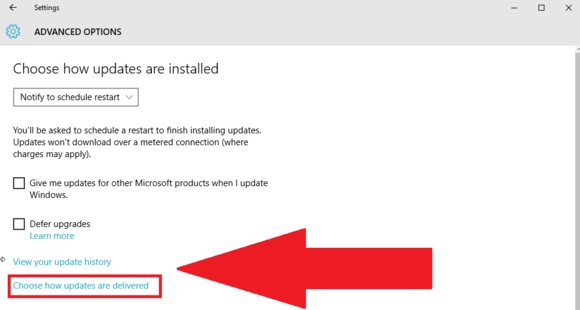
Step #3: Click “Choose how updates are delivered.”
Step #4: Disable the toggle under “Updated from more than one place.”
Remove Default Apps (if you don’t need them)
Windows 10 ships with a bunch of default apps that many users may not need. For examples, I would never want apps like Microsoft Solitaire Collection, Money, News, Phone Companion, or Sports apps.
You can’t remove the default apps the same way you get rid of the apps you have installed.
While these apps won’t take up a huge space on your machine, you might want to remove them to reduce the clutter.
Some of the defaults apps can be removed from the command line.

Follow the instruction below to remove the unwanted default apps from your PC.
Step #1: Search for powershell in the search box and open PowerShell prompt as an Administrator
Step #2: Copy and Paste the following commands into the PowerShell prompt and then press enter.
Uninstall 3D Builder: Get-AppxPackage *3dbuilder* | Remove-AppxPackage
Uninstall Microsoft Solitaire Collection: Get-AppxPackage *solitairecollection* | Remove-AppxPackage
Uninstall OneNote: Get-AppxPackage *onenote* | Remove-AppxPackage
Likewise, you can uninstall many other apps using the above commands – just change the app name in the command.
To remove Xbox, the command is: Get-AppxPackage *xboxapp* | Remove-AppxPackage where the app name is “xboxapp”. Here are some app names you can use in your commands to remove the following apps:
Weather: bingweather
Voice Recorder: soundrecorder
Sports: bingsports
Photos: photos
Phone Companion: windowsphone
People: people
OneNote: onenote
News: bingnews
Movies & TV: zunevideo
Money: bingfinance
Maps: windowsmaps
Get Skype: skypeapp
Get Office: officehub
Camera: windowscamera
Stop Sharing Your Wi-Fi
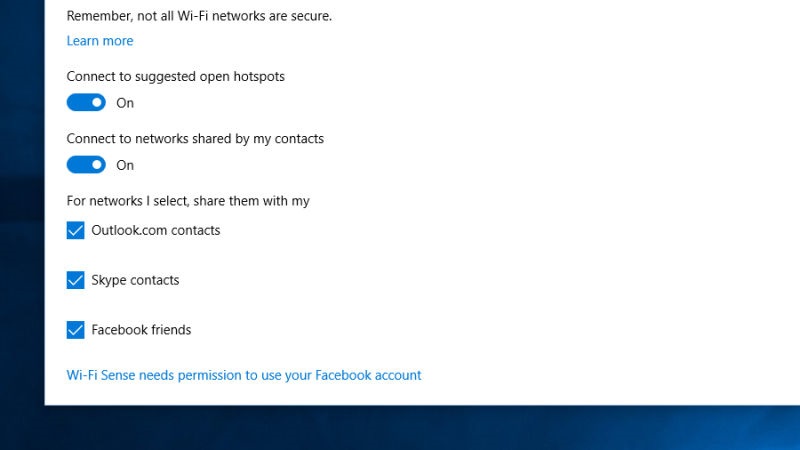
Windows 10 comes with a Wi-Fi Sense feature which automatically share your internet connection over Wi-Fi. If you’d rather not want it, change the default settings by following the steps below:
- Search Wi-Fi settings on the taskbar
- Choose Wi-Fi Settings
- Click on Manage Wi-Fi Settings
- Uncheck all the boxes under “For networks I select, share them with.”
Turn on System Protection
System Protection is a feature that lets you undo a Windows Update in case a future update contains any serious bug which can be harmful to your computer. By default, the System Protection on all drives including C drive (where users usually install the operative system) is turned off on Windows 10.

If you want to enable it – which is a wise decision – following the steps bellows:
- Click Open the File Explore Window from the task bar
- On the Left Panel, Right Click on the This PC option and Go to Properties
- Click on the System Protection option on the Left Panel
- Choose Local Disk (C:) and Click on Configure Option Below
- Turn on the System Protection option and Click Apply
Activate (or Deactivate) Cortana
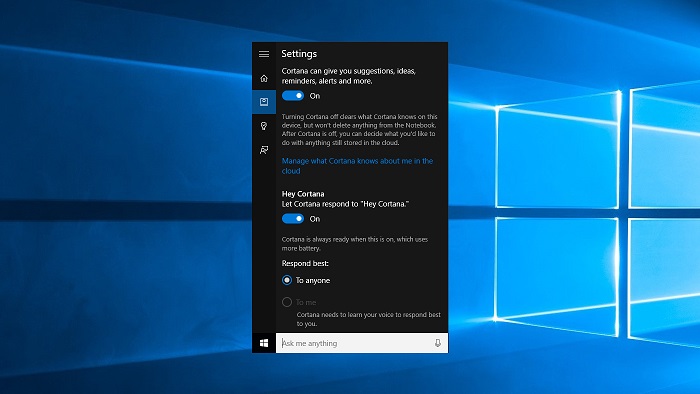
Cortana is a new feature for many Windows 10 user. However, for many Windows-based smartphone users, the digital assistant has been around for a while. As desktop PC user, you can enable or disabled it by following the steps below:
- Click Start Button
- Choose Cortana
- Open Notebook (third icon down)
- Turn Cortana on/off and/or Disable “hey Cortana!” voice command.
Hope these tips will be helpful for you to customize Windows 10 and experience the best of it. If you have any questions about applying these tips, don’t hesitate to contact me.